Update: As of December 2020, Travis CI has stopped being free for open source projects. If you've been using Travis to deploy your static site, I recommend migrating to Github Actions. I've written a post about how to do so here.
I’m an unabashed supporter of “Keep It Simple, Stupid” solutions - it’s the reason I use Pelican for this website and host it on S3.
However, I haven’t been completely satisfied with the process of writing a new post or making changes to my theme. It’s felt repetitive - make a change, generate site, check change, regenerate site, and eventually push to S3. Due to the extra steps of generating and pushing, I never felt able to focus on just the change at hand.
I wanted to focus, but also maintain the flexibility of a static site.
Enter TravisCI. Travis is a continuous integration (CI) service hosted at GitHub. Setup a .travis.yml file, check your code into GitHub, and Travis will build the project based on the steps laid out in your .travis.yml. A common use-case of CI is automatically running a test suite against each new commit to make sure a change didn’t break functionality of the app.
Since Pelican is just a Python application, and Travis has S3 integration, I’m now using it to regenerate and deploy my site every time I push a change to it on GitHub.
If you’re using Pelican (or any other static site generator) and hosting on S3, here’s how to set things up.
Setup
First, sign up for Travis - you’ll just need to login with your GitHub account. Travis will then sync with your GitHub repos. Turn on the GitHub repo(s) you’ll be using it with. For me, it’s just my website.

Next, create a new Identity & Access Management (IAM) user on AWS for Travis. Make note of the security credentials - the Access Key ID and Secret Access Key. You’ll need these later.
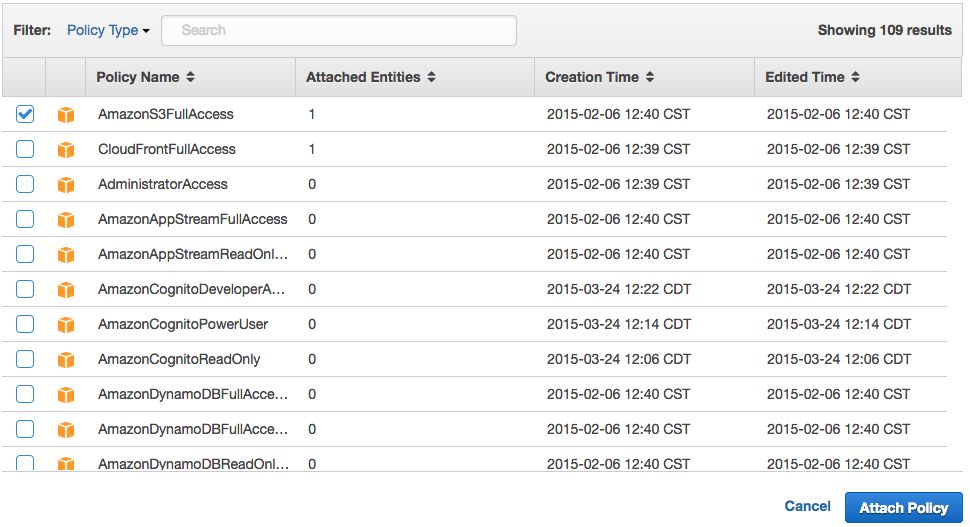
Also, since this user will need to write files to S3, make sure it has the AmazonS3FullAccess policy. To do so, click on your new user in the IAM dashboard, click “Attach Policy” (in the Managed Policies section), select AmazonS3FullAccess, and attach. Done.
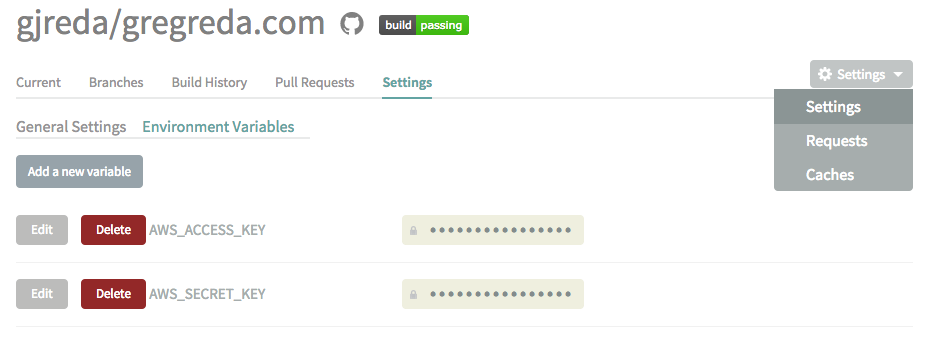
Now, you’ll need to add your AWS Access Key ID and Secret Access Key to your repo’s environment variables in Travis. These are needed in order to write your site’s files to S3.
Lastly, you’ll need to add a .travis.yml file to the root of your project. This tells Travis how to build the application (in this case, a static site generator). Here’s what mine looks like:
language: python
python:
    - "2.7"
cache: apt
install:
    - "sudo apt-get install pandoc"
    - "pip install -r requirements.txt"
script: "pelican content/"
deploy:
    provider: s3
    access_key_id: $AWS_ACCESS_KEY # declared in Travis repo settings
    secret_access_key: $AWS_SECRET_KEY
    bucket: www.gregreda.com
    endpoint: www.gregreda.com.s3-website-us-east-1.amazonaws.com
    region: us-east-1
    skip_cleanup: true
    local-dir: output
    acl: public_read
    detect_encoding: true
notifications:
    email:
        on_failure: always
Here’s a quick rundown:
language- The language in which the application is written. Since we’re using Pelican, it’s Python, but Travis supports a variety of languages. We also specify a version on the next line.install- This tells Travis any dependencies that need to be installed via apt-get. Some of my posts have IPython Notebook integration, which uses pandoc. I’m also using pip to install the required Python packages (like Pelican).script- Your build command. In this case, it’s justpelican content, which generates the static site based off of what’s in the content directory. By default, Pelican writes the site to a local directory calledoutput, which we need in the deploy step.deploy- Since Travis has S3 deployment built-in, all we need to do is tell it which directory (local-dir) to put where (yourbucketand its relatedendpointandregion). Note that we’re also using our AWS keys - the variable names used here must match the names we provided in the environment variables section earlier.notifications- By default, Travis will email you the results of each build. I’ve turned them off, but there are other notification options as well.
The above is really just a subset of the functionality Travis provides - you can even declare scripts to be run before and after install, or before and after your deploy. Check out the build configuration section of the docs if you’re interested in learning more.
Now, every time I push a commit to GitHub, Travis will clone my repo, cd to it, build, and deploy my site all based on what’s in my .travis.yml file. And I get to focus on writing.
Have questions? Let me know.